Welcome to our blog! In today’s article, we will guide you on the proper installation of pipe flanges. As a leading flange manufacturer based in Cangzhou, Hebei, China, we specialize in producing a wide range of flange pipe fittings, including various standards such as ANSI, DIN, and JIS, as well as non-standard flanges. We are committed to expanding our products to the global market, with a particular focus on Europe and North America.
Installing pipe flanges may appear straightforward, but it requires expertise and specific techniques. This article aims to provide you with comprehensive instructions and best practices for the efficient and correct installation of flange pipe fittings. We will discuss different types of flanges, material selection, safety precautions, alignment techniques, bolt tightening, gasket selection, and troubleshooting common installation issues.
Our blog offers rich and in-depth content, and our expertise and authority in the field ensure trustworthy guidance. Whether you are an engineer, a construction professional, or an individual with an interest in flange pipe fittings installation, this article will provide valuable insights.
Now, let’s dive into the details of properly installing pipe flanges to ensure the safe and efficient operation of your engineering projects. Please continue reading the main text to learn about key steps, techniques, and solutions for common issues.
Thank you for joining us, and let’s proceed with the article.
I. Introduction to Pipe Flanges
Welcome to our comprehensive guide on pipe flanges installation. In this article, we will cover everything you need to know about pipe flanges, including their definition, purpose, types, and materials used. Whether you are a professional in the industry or someone interested in understanding more about pipe flanges, this article will provide you with valuable insights.
A. Definition and Purpose of Pipe Flanges:
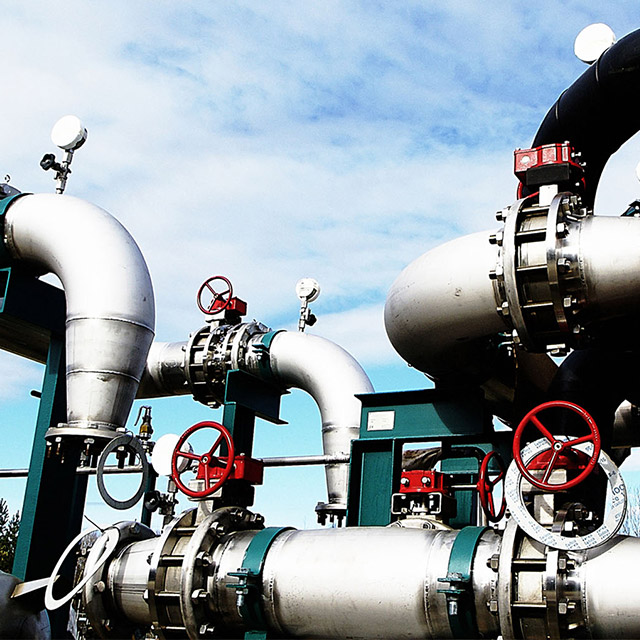
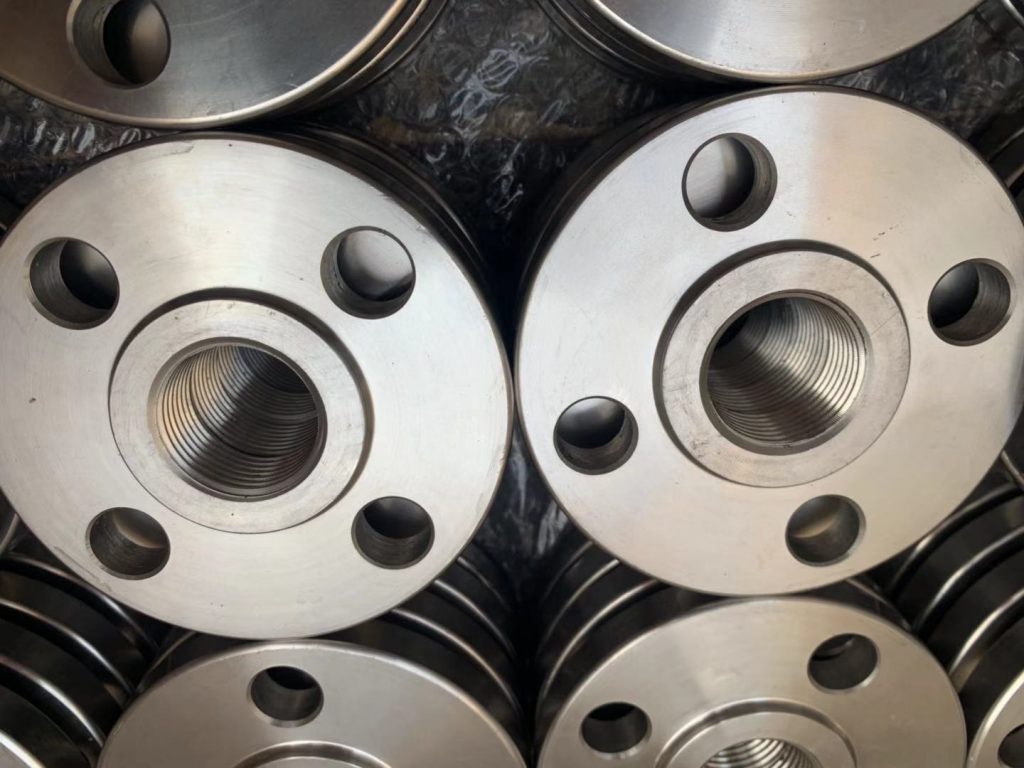
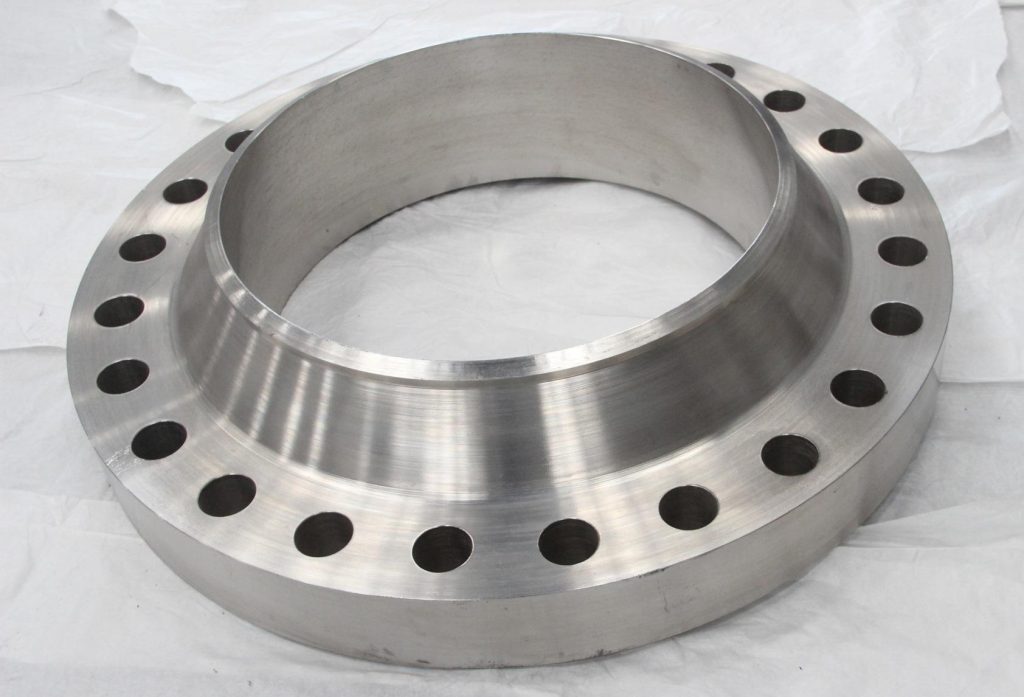
Pipe flanges are essential components used to connect pipes, valves, and other equipment in various industries, such as oil and gas, petrochemical, power generation, and plumbing. A pipe flange is a disc or ring-shaped fitting that is attached to the end of a pipe, providing a surface for connecting and securing pipes together. It acts as a joint between two pipes, allowing for easy assembly, disassembly, and maintenance.
The purpose of pipe flanges extends beyond mere connection; they also play a crucial role in providing strength, stability, and leak-free operation in piping systems. Flanges offer a secure and reliable connection, ensuring the integrity and efficiency of fluid or gas flow within the system.
B. Types of Pipe Flanges (ANSI, DIN, JIS, Non-standard):
Pipe flanges come in various types, each designed to meet specific industry standards and requirements. Some of the commonly used types include:
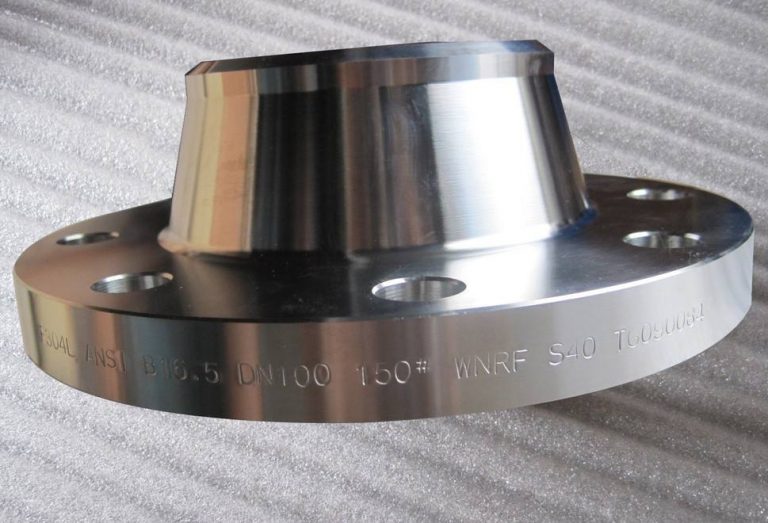
- ANSI Flanges: These flanges conform to the standards set by the American National Standards Institute (ANSI). They are widely used in North America and come in different pressure classes, such as ANSI 150, ANSI 300, ANSI 600, and ANSI 900.
- DIN Flanges: DIN flanges follow the standards established by the Deutsches Institut für Normung (DIN), a German standards organization. DIN flanges are popular in Europe and are available in various sizes and pressure ratings, such as PN6, PN10, PN16, PN25, and PN40.
- JIS Flanges: JIS flanges adhere to the standards set by the Japanese Industrial Standards (JIS). They are commonly used in Japan and other Asian countries, offering different pressure ratings like JIS 5K, JIS 10K, JIS 16K, JIS 20K, and JIS 30K.
- Non-standard Flanges: In addition to standardized flanges, there are non-standard flanges that are custom-made to meet specific project requirements. Non-standard flanges can be designed with unique dimensions, materials, or connection types, tailored to suit specialized applications.
C. Materials Used for Pipe Flanges (Stainless Steel, Alloy Steel, Carbon Steel):
Pipe flanges are manufactured using a variety of materials, selected based on factors such as operating conditions, fluid or gas characteristics, and compatibility with the connected pipes. Some common materials used for pipe flanges include:
- Stainless Steel: Known for its corrosion resistance, stainless steel flanges are suitable for applications where resistance to chemical corrosion and high temperatures is required. Different grades of stainless steel, such as 304, 316, and 316L, are chosen based on specific environmental conditions.
- Alloy Steel: Alloy steel flanges offer high strength and excellent resistance to wear, heat, and pressure. These flanges are commonly used in industries that deal with high-temperature and high-pressure environments, such as oil and gas refineries and power plants.
- Carbon Steel: Carbon steel flanges are durable, cost-effective, and widely used in various industries. They provide good strength and are suitable for general-purpose applications. Carbon steel flanges are available in different grades, such as ASTM A105, ASTM A350 LF2, and ASTM A694 F52, each with its specific properties and usage.
Understanding the definition, purpose, types, and materials of pipe flanges is crucial for the successful installation and efficient operation of piping systems. By comprehending these aspects, you can make informed decisions when selecting the appropriate flanges for your specific application.
Flanges are not only functional components but also critical for maintaining system integrity, preventing leaks, and ensuring safe and reliable operation. With the right type of flange and suitable material, you can achieve a robust and durable connection between pipes, facilitating seamless fluid or gas flow.
In the upcoming sections of this blog, we will delve deeper into the installation process, providing step-by-step guidance on how to install pipe flanges correctly. We will cover essential aspects such as safety precautions, necessary tools and equipment, proper alignment techniques, bolt-tightening procedures, gasket selection, and welding or threaded connections.
Furthermore, we will discuss best practices and share valuable tips to help you overcome common installation challenges. Troubleshooting techniques will be provided to address potential issues such as flange misalignment, bolt and gasket failures, and joint leakage.
At YANHAO we take pride in our expertise in the field of flange manufacturing. Our products adhere to international standards and are made from high-quality materials, ensuring exceptional performance and longevity. We are committed to providing you with comprehensive knowledge and assisting you in achieving successful pipe flange installations.
Now, let’s proceed to the main body of the blog, where we will guide you through the step-by-step process of installing pipe flanges.
II. Preparing for Installation
Before proceeding with the installation of pipe flanges, it is crucial to take necessary safety precautions, gather the required tools and equipment, and carefully select and inspect the pipe flanges. This section will guide you through these preparatory steps to ensure a smooth and successful installation process.
A. Safety Precautions:
- Always prioritize safety by wearing appropriate personal protective equipment (PPE), such as safety glasses, gloves, and steel-toed boots.
- Ensure proper ventilation in the work area, especially when working with hazardous materials or in confined spaces.
- Follow relevant safety guidelines and regulations, including those specific to your industry and worksite.
- Use caution when handling heavy or bulky flanges and avoid overexertion to prevent strain or injury.
- Be aware of potential hazards, such as sharp edges, hot surfaces, or nearby electrical equipment, and take appropriate measures to mitigate risks.
- If working at heights, use proper fall protection equipment and ensure a stable working platform.
B. Tools and Equipment Required:
- Measuring Tools: Calipers, rulers, and measuring tapes for accurate pipe and flange measurements.
- Cutting Tools: Pipe cutters, saws, or grinders to prepare the pipes for installation.
- Wrenches: Adjustable wrenches or pipe wrenches to tighten and loosen bolts.
- Torque Wrench: To achieve the recommended bolt tightening torque accurately.
- Gasket Cutting Tools: Scissors or gasket punch sets for cutting gaskets to the required size and shape.
- Flange Aligning Tools: Alignment pins, jacks, or alignment clamps to ensure proper alignment during installation.
- Welding Equipment: If applicable, welding machines, electrodes, and protective gear for welding flanges.
- Cleaning Materials: Wire brushes, solvents, and rags to clean pipe ends and flange surfaces before installation.
C. Pipe Flange Selection and Inspection:
- Consider the application, operating conditions, and system requirements when selecting the appropriate pipe flanges. Refer to industry standards such as ANSI, DIN, or JIS to ensure compatibility.
- Inspect the flanges for any defects, such as cracks, deformations, or corrosion. Ensure the flanges are free from burrs or rough edges that could hinder proper sealing.
- Verify the dimensions, pressure ratings, and material specifications of the flanges to ensure they meet the project requirements.
- Check the flange face finish to ensure it matches the gasket surface requirements, such as raised face (RF), flat face (FF), or ring-type joint (RTJ).
- If gaskets are included with the flanges, inspect them for any damage or deterioration. Ensure they are the correct type and size for the intended application.
By following these preparatory steps, you can create a safe working environment, have the necessary tools at hand, and ensure the proper selection and inspection of pipe flanges. These actions will contribute to a successful installation process and the long-term performance of your piping system.
In the next section, we will dive into the installation process, providing detailed guidance on marking, aligning, bolting, gasket placement, and testing the installed flange.
III. Installation Process
Now that we have completed the necessary preparations, we can proceed with the installation of pipe flanges. This section will guide you through the step-by-step process to ensure a proper and secure installation.
A. Marking and Aligning the Flanges:
- Begin by marking the pipe and flange connection points using a measuring tool. Ensure the markings are accurate and aligned properly.
- Align the flanges by matching the bolt holes and ensuring that the faces of the flanges are parallel.
- Use alignment tools such as pins, jacks, or clamps to hold the flanges in the correct position during the installation process.
- Make any necessary adjustments to achieve precise alignment before proceeding to the next step.
B. Bolting and Torqueing the Flange Joints:
- Insert the bolts into the bolt holes, ensuring they pass through both flanges.
- Apply an appropriate lubricant or anti-seize compound to the bolts to facilitate proper tightening.
- Begin tightening the bolts using a crisscross pattern to ensure an even distribution of force. Gradually increase the torque in multiple stages.
- Consult the manufacturer’s specifications or industry standards for the recommended bolt-tightening torque values.
- Utilize a torque wrench to achieve the desired torque accurately. Avoid overtightening, as it can damage the flanges or compromise the integrity of the joint.
C. Proper Gasket Selection and Placement:
- Select the appropriate gasket material based on compatibility with the fluid or gas, operating conditions, and flange face finish.
- Ensure the gasket size matches the flange dimensions and that the gasket thickness is suitable for the application.
- Place the gasket on the face of one flange, ensuring it sits properly within the bolt circle.
- Align the second flange over the gasket, taking care not to displace or damage it during alignment.
D. Welding or Threaded Connections:
- If welding is required, follow proper welding procedures, ensuring that the welding process and materials are suitable for the flange and pipe material.
- For threaded connections, apply a suitable thread sealant to the threaded portions of the pipe and tighten the connections using a wrench or appropriate tool.
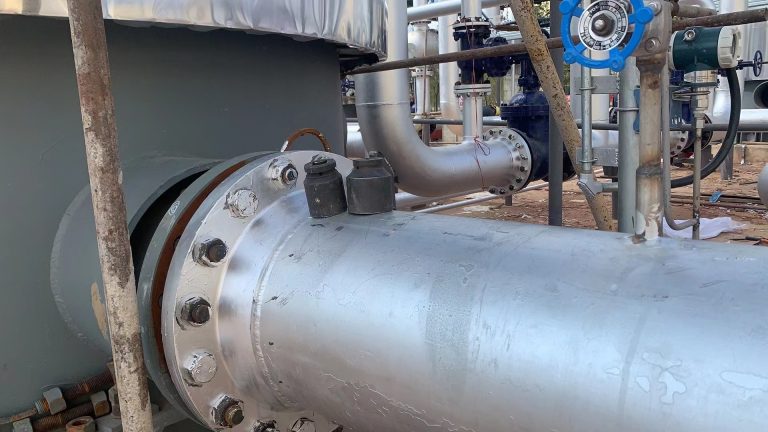
E. Testing and Inspecting the Installed Flange:
- Conduct a visual inspection of the installed flange to ensure there are no visible defects, such as leaks, cracks, or misalignments.
- Perform a pressure test or leak test to verify the integrity of the joint and the absence of leaks.
- Inspect the flange joint for any signs of leakage during the test, paying close attention to the bolted connections and gasket area.
- If any issues or leaks are identified, take the necessary corrective measures, such as retightening bolts or replacing the gasket.
By following these installation steps diligently, you can achieve a properly installed pipe flange that ensures a secure and leak-free connection. In the next section, we will discuss best practices and tips to enhance the success of your installation process and address common installation challenges.
IV. Best Practices and Tips for Successful Installation
To further enhance the success of your pipe flange installation and ensure a reliable and efficient connection, consider the following best practices and tips:
A. Flange Alignment Techniques:
- Use alignment tools, such as alignment pins, jacks, or clamps, to achieve precise alignment between flanges. This helps prevent misalignment issues and ensures a proper fit.
- Perform a visual inspection to verify alignment before tightening the bolts. Misalignment can lead to leaks and compromised joint integrity.
B. Proper Bolt Tightening Sequence:
- Follow a crisscross or star pattern when tightening the bolts. This helps distribute the force evenly across the flange, promoting a uniform and secure joint.
- Gradually increase the torque in multiple stages, rather than applying maximum torque at once, to minimize the risk of flange distortion or gasket damage.
C. Importance of Flange Face Finish:
- Pay attention to the flange face finish, such as the raised face (RF), flat face (FF), or ring-type joint (RTJ), and select the appropriate gasket accordingly. The flange face finish determines the type of gasket required for effective sealing.
- Ensure that the flange face is clean, smooth, and free from any debris, rust, or imperfections that could compromise the seal.
D. Preventing Leakage and Ensuring Joint Integrity:
- Choose the correct gasket material based on the application and fluid or gas being conveyed. The gasket should provide proper sealing and chemical compatibility.
- Properly position and align the gasket within the bolt circle to ensure it remains in place during installation and does not get pinched or damaged.
- Avoid over-tightening the bolts, as it can cause gasket deformation or extrusion, leading to leaks. Follow the recommended torque values specified by the manufacturer or industry standards.
- Conduct a pressure or leak test after installation to verify the joint integrity and identify any potential leaks or issues. Address any leaks promptly by retightening bolts or replacing the gasket if necessary.
By adhering to these best practices and tips, you can minimize the risk of leaks, ensure a secure and reliable joint, and enhance the overall performance of your piping system.
In the next section, we will discuss common challenges and troubleshooting techniques during pipe flange installation to help you overcome any potential issues that may arise.
V. Troubleshooting Common Installation Issues
During the installation of pipe flanges, certain issues may arise that can affect the performance and integrity of the joint. Understanding these common challenges and having the knowledge to address them is crucial. Here are some troubleshooting techniques for common installation issues:
A. Flange Misalignment and Remedies:
- Issue: Flange misalignment can occur due to improper handling, inaccurate marking, or insufficient alignment tools. Solution:
- Carefully handle and position the flanges to avoid misalignment.
- Double-check measurements and markings before aligning the flanges.
- Use alignment tools, such as pins, jacks, or clamps, to correct misalignment. Gradually adjust the alignment until proper alignment is achieved.
B. Bolt and Gasket Failures and Solutions:
- Issue: Bolt failures, such as breaking or loosening, can lead to joint leakage or compromised joint integrity. Solution:
- Ensure proper bolt selection, considering factors such as material, size, and strength requirements.
- Follow the recommended bolt tightening sequence and torque values specified by the manufacturer or industry standards.
- Use locking mechanisms, such as washers or locking nuts, to prevent bolt loosening.
- Regularly inspect bolts and replace any damaged or worn-out bolts promptly.
- Issue: Gasket failures, such as extrusion, blowout, or insufficient sealing, can result in joint leakage. Solution:
- Select the appropriate gasket material based on the application requirements and compatibility with the conveyed fluid or gas.
- Ensure the gasket size and thickness match the flange dimensions and operating conditions.
- Properly position and align the gasket within the bolt circle to prevent pinching or damage during installation.
- Verify that the flange face finish matches the gasket requirements (e.g., raised face, flat face, or ring-type joint).
- Consider using additional gasket sealing methods, such as sealants or adhesive coatings, for added protection.
C. Joint Leakage and Repair Methods:
- Issue: Joint leakage can occur due to factors such as improper bolt tightening, gasket damage, or flange surface imperfections. Solution:
- Retighten the bolts following the recommended torque values and tightening sequence. Ensure proper gasket compression.
- Inspect the gasket for any damage or deformation and replace it if necessary.
- Clean and prepare the flange surfaces, removing any debris, rust, or imperfections. Use suitable sealants or gasket coatings to enhance sealing.
- If leakage persists, consider disassembling the joint, inspecting all components, and reassembling with a new gasket.
Remember, it is crucial to address installation issues promptly to prevent further complications and ensure a reliable and leak-free joint. If you encounter persistent issues or require assistance, consult a qualified professional or contact our experts at [Your Company Name].
In the concluding section of this blog, we will summarize the key points discussed and emphasize the importance of proper pipe flange installation for the overall performance and longevity of your piping system.
VI. Conclusion
Proper installation of pipe flanges is essential for the successful operation and longevity of piping systems. Throughout this blog, we have explored the definition, purpose, types, and materials of pipe flanges, as well as the step-by-step installation process. We have also discussed best practices, troubleshooting techniques, and the importance of safety, alignment, bolt tightening, gasket selection, and joint integrity.
By understanding the intricacies of pipe flange installation and following industry standards and best practices, you can achieve secure and leak-free connections. Adhering to safety precautions, using the right tools and equipment, selecting suitable flanges and gaskets, and ensuring proper alignment and torquing of bolts are crucial steps in the installation process.
In case of common installation challenges such as flange misalignment, bolt or gasket failures, or joint leakage, it is essential to troubleshoot and address the issues promptly. By following the suggested solutions and seeking professional assistance when needed, you can overcome these challenges and maintain the integrity of your piping system.
At YANHAO, we take pride in our expertise and commitment to providing high-quality pipe flanges. We understand the significance of proper installation techniques and the impact they have on system performance. We are here to assist you with any questions, offer guidance, and ensure that your pipe flange installations meet the highest standards.
Remember, proper pipe flange installation is not only about functionality but also about safety, efficiency, and system integrity. By investing time and effort in understanding the installation process and implementing best practices, you can ensure the optimal performance and longevity of your piping system.
Thank you for reading this blog, and we hope it has provided you with valuable insights into the installation of pipe flanges. For further information or inquiries, please don’t hesitate to contact us at [sales@flangeschina.com].
Lewis Liu
Hello, I am Lewis Liu, a professional sales engineer with over ten years of experience in the flange fittings industry. I am highly knowledgeable in flange selection, installation, and maintenance. I am passionate about providing customers with the best solutions to ensure their pipeline systems run smoothly, safely, and reliably.
If you have any questions or concerns regarding flange fittings for your pipelines, whether it’s about selection, material choice, specification requirements, or any other aspect, please feel free to contact me at any time. I am committed to offering professional advice and assistance to help you make informed decisions and meet your needs.